Connecting to Snowflake database
There are several ways to connect to your Snowflake database.
Using key-pair authentication
You can generate a private-public RSA key pair that you can use for authenticating with your Snowflake database.
If you are on a Cloud plan, Enso will handle generating the key pair for you and store it as an Enso Secret within your account.
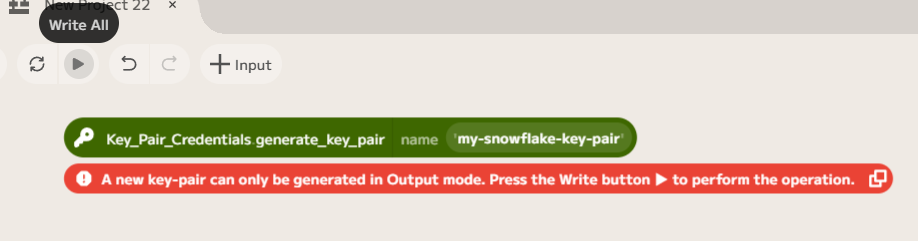
In your workflow, insert a Key_Pair_Credentials.generate_key_pair node. The
first time you run it, it will generate a new RSA key-pair and store it as a
secret in your Cloud account. To make it run, you need to click the Write All
button. It generates a new key-pair upon the first run, and on any subsequent
run it only locates the already existing key-pair.
Once generated, you can open the visualization which will show you the SQL command that you (or your Snowflake account administrator) must run to associate the new key-pair with your account:
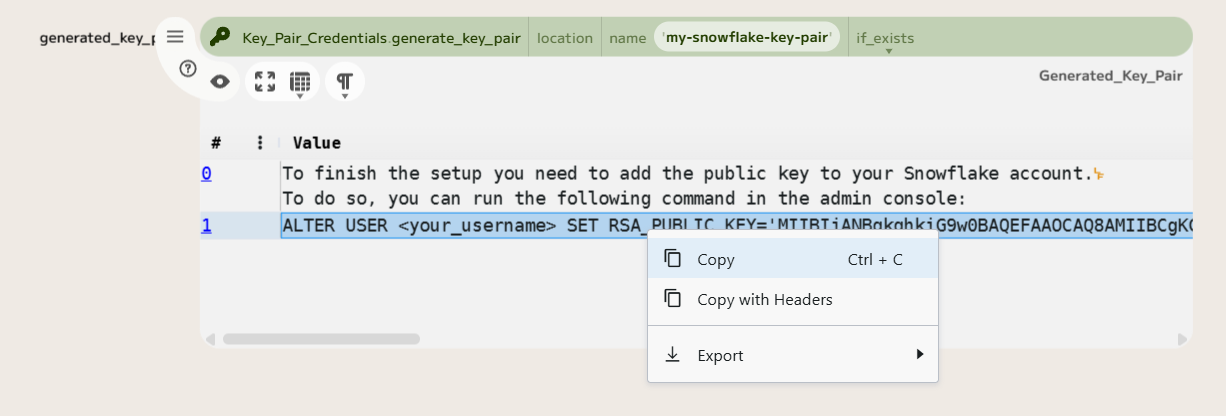
You can right click the command to copy it. You will need to replace
<your_username> with your Snowflake account username.
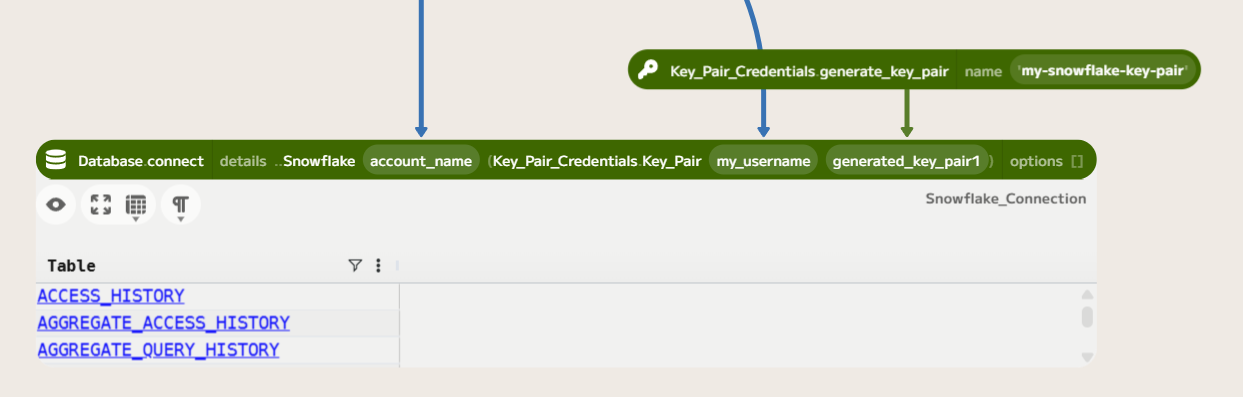
Once the command has been run, all you need to do is create a Database.connect
node and select Snowflake.
In the account argument put the full name of your Snowflake account, you can
find it by running the following SQL command:
SELECT CURRENT_ORGANIZATION_NAME() || '-' || CURRENT_ACCOUNT_NAME();
In credentials, select Key Pair, then type in your username and connect
the generate_key_pair you created earlier to the private_key argument:
OAuth integration
You can set up an OAuth integration with Enso on your Snowflake account, allowing you to connect to the Snowflake account from the Cloud Dashboard.
To set up the integration, you need the following command in your Snowflake account (e.g. inside of a worksheet):
CREATE SECURITY INTEGRATION "your_enso_oauth_integration"
  TYPE = OAUTH
  ENABLED = TRUE
  OAUTH_CLIENT = CUSTOM
  OAUTH_CLIENT_TYPE = 'PUBLIC'
  OAUTH_REDIRECT_URI = 'https://7aqkn3tnbc.execute-api.eu-west-1.amazonaws.com/oauth/snowflake/callback'
  OAUTH_ISSUE_REFRESH_TOKENS = TRUE
  OAUTH_REFRESH_TOKEN_VALIDITY = 7776000
;
You may need to ask your account administrator to do this if your own user account does not have the necessary permissions.
Note that the OAUTH_REDIRECT_URI needs to be set exactly as specified,
otherwise Enso will not be able to authenticate with your integration.
The OAUTH_REFRESH_TOKEN_VALIDITY sets the validity of your credentials in
seconds. The amount given in the example query corresponds to the maximum
validity of 90 days. You can set it to a lower value, but keep in mind that once
your credentials expire you will need to re-create them.
See
CREATE SECURITY INTEGRATION documentation for Snowflake
to see other optional parameters that can be used.
Once you have created the integration you will need to create credentials for your account in the Cloud Dashboard.
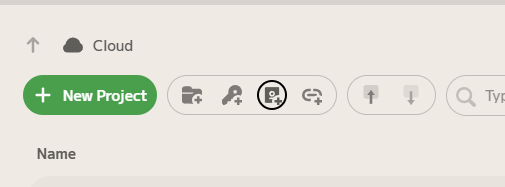
Press the New Credential button and select Snowflake. Then you will need to fill-out the configuration. Here's how you can do this:
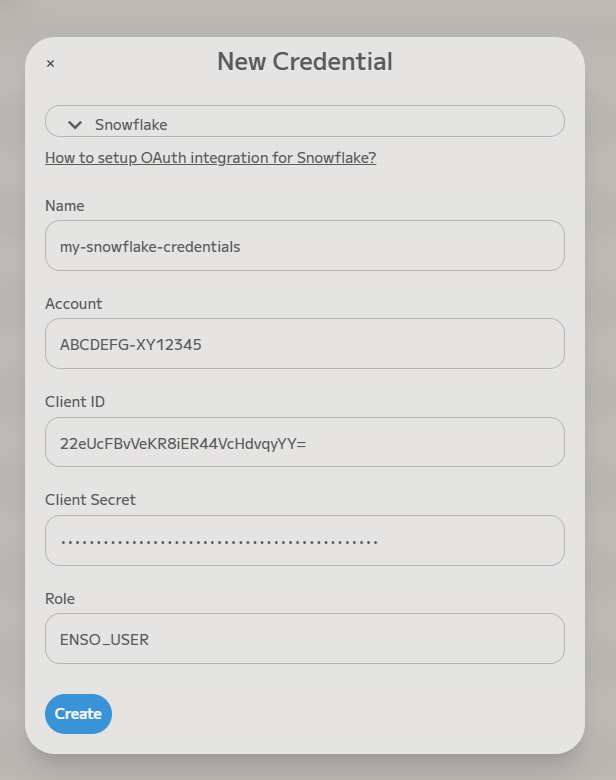
You can use the following commands to find out the values for each field:
- Account is your full Snowflake account name, you can find it by running
SELECT CURRENT_ORGANIZATION_NAME() || '-' || CURRENT_ACCOUNT_NAME(); - You can run
to find out Client ID and Client Secret corresponding with your newly created OAuth integration. The command returns a JSON structure like:
SELECT SYSTEM$SHOW_OAUTH_CLIENT_SECRETS('your_enso_oauth_integration');The{
"OAUTH_CLIENT_SECRET_2": "...",
"OAUTH_CLIENT_SECRET": "...",
"OAUTH_CLIENT_ID": "22eUcFBvVeKR8iER44VcHdvqyYY="
}OAUTH_CLIENT_IDis your Client ID and you can choose eitherOAUTH_CLIENT_SECRETorOAUTH_CLIENT_SECRET_2for Client Secret (two values are provided to aid in secret rotation if needed). - Finally, Role is the role that you will assume when connecting using the
credentials that you will create. You should choose an appropriate role that
your account is associated with.
- You can list all available roles using the command
SHOW ROLES;. - Note that some roles (
ACCOUNTADMIN,ORGADMIN,GLOBALORGADMIN, andSECURITYADMIN) cannot be used for these credentials by default. If you want to explicitly enable them, see Snowflake documentation for more information.
- You can list all available roles using the command
After clicking Create, a Snowflake login page will open. Once you finish the authentication, go back to the Dashboard.
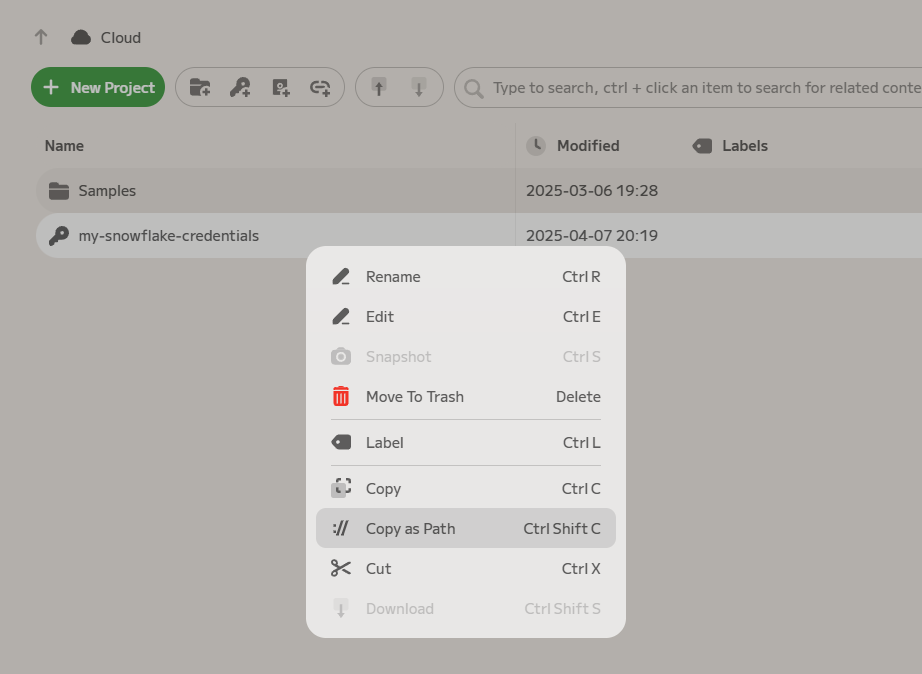
You can right click on your newly created credential and copy its path:
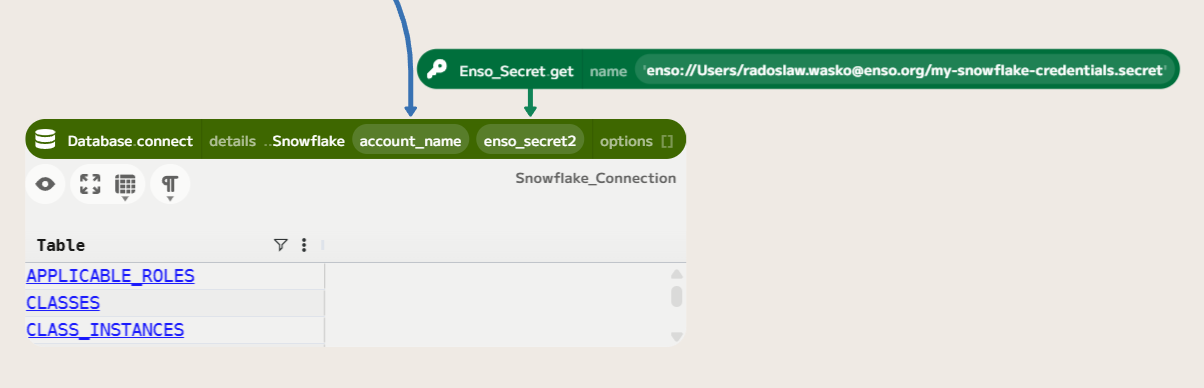
Now in your Enso workflow, you can create an Enso_Secret.get node and paste
this path for the name argument. Then create a Database.connect node and
select Snowflake. In the account argument put the same account name as the
Account field in your credential configuration above, and connect the
Enso_Secret node to the credentials argument.